
I don’t usually sew dresses, because my lifestyle has no place for them, but I liked the quaint styling of this one. I thought it might be a good garden dress, for doing light garden chores
during the summer, like watering plants and picking flowers. The “frockiness” of it appealed to me, so I bought the pattern when it was on sale at Joann’s. I made view B.
Personal Pattern Sizing Details
My figure is pear shaped, which means I need the smallest size on top, largest in the hips. I cut the pattern bodice according to the size recommendations for full bust. I graded the pattern up 1 size in the middle bodice, and then again 1 size more for the hips. I wanted a smooth transition between bodice and skirt, so I thought the best way would be to grade gradually. This way there wouldn’t be a problem of severely mismatched pieces at the bodice and skirt.
I was on the money with the skirt sizing, but the bodice is definitely too big. This makes me pissed, because I went with their sizing chart. I hate to think that I have to make a muslin for every thing I sew (wovens especially), but pattern sizing can be really variable and hopelessly basic, so I should’ve made a muslin of the bodice. If I had, I’d have known that I needed to cut 1 size down, shorten the bodice because I’m petite, and make a narrow shoulder adjustment. This pattern is extremely bootleg: it has no alteration suggestions whatsoever, not even lengthen/shorten points for the skirt.
Aesthetics
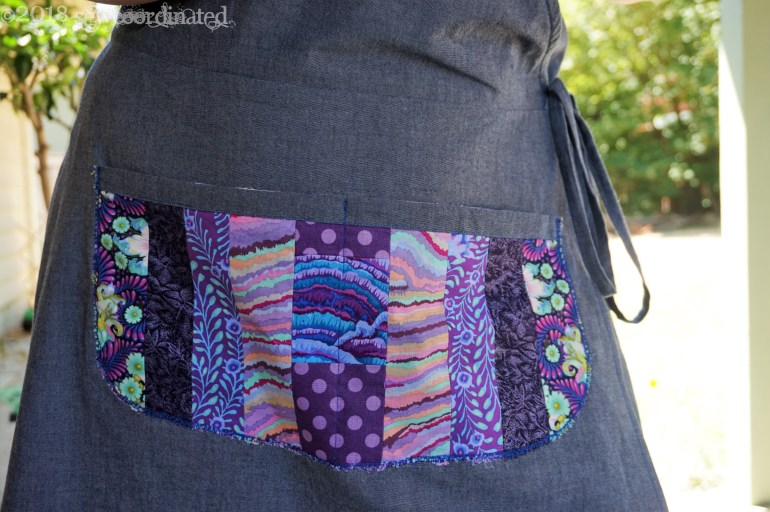
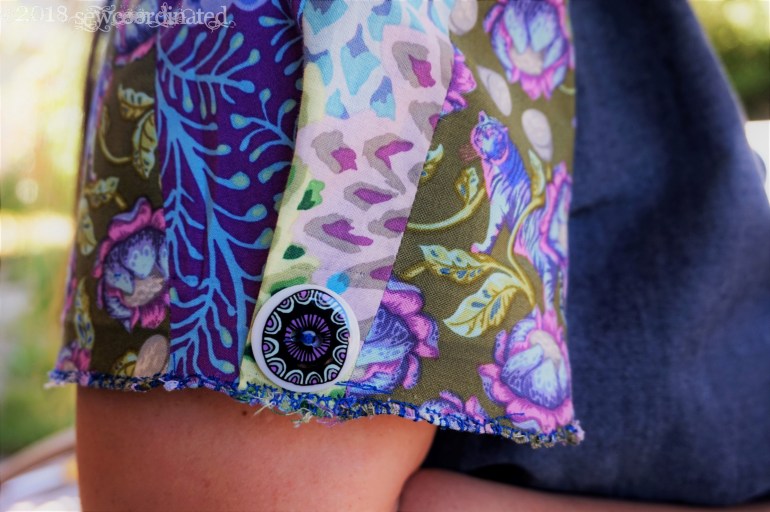
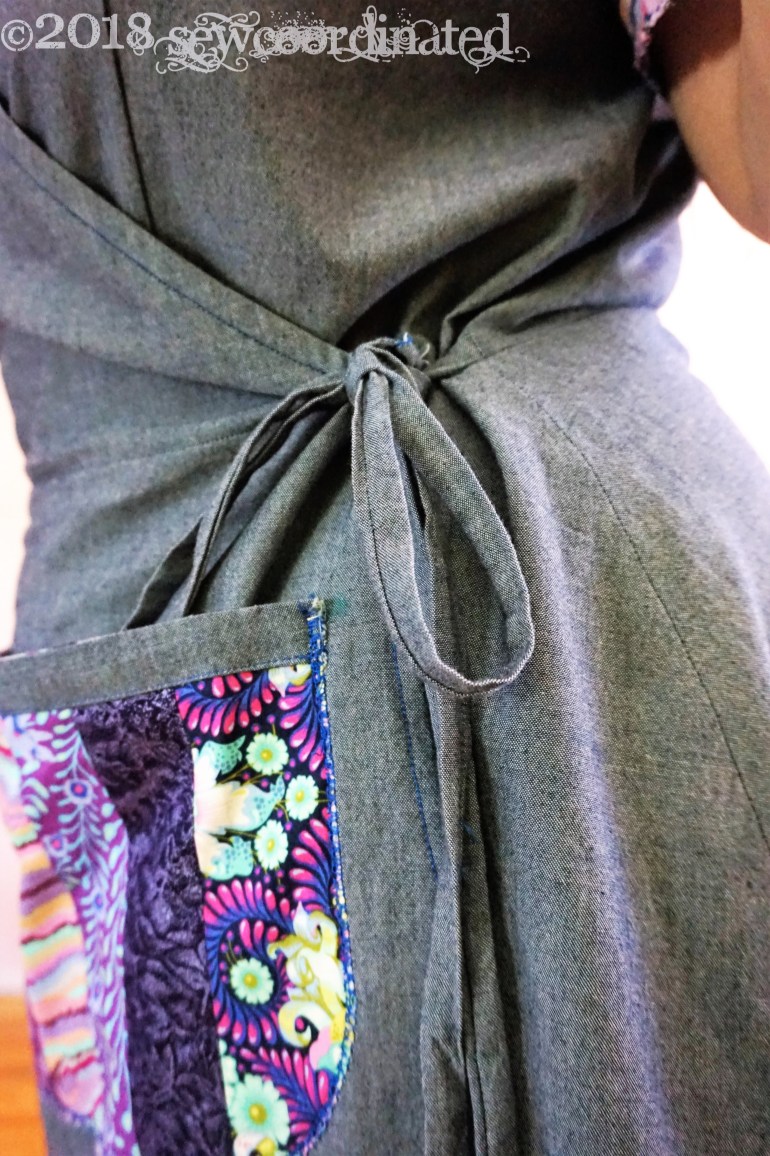
I have tons of fabric scraps, and now that I sew for a living, I have even more! Awesome woven prints from designers like Kaffe Fassett and Michael Miller that I hated to throw away and were screaming to be put to use, so I decided to put my quilting skills to use and drafted the sizable front pocket and sleeves of the dress in patchwork from these scraps. I think it really suits the style of the dress, which is vintage Americana.
Pattern Problems
There are a number of errors in the pattern instructions:
1. You don’t have to understitch the neck/front facing, but you’re told to do so in the instructions. Understitching is for when a facing won’t be stitched down, to keep it from rolling out from under the inside, and this one is stitched down, so no need for it.
2. The “ribbon” that’s mentioned in step 5 isn’t listed in the needed notions. It’s used to tie the inside of the dress. I used the bias tape that I bought for the pocket instead.
3. There aren’t any instructions on how to finish the stay that’s used under the front shoulder gathers, and there probably should be.
and finally,
4. The rick rack shown on the model’s dress on the front envelope also isn’t mentioned in the notions to buy list, but IS mentioned in the sewing instructions.
I had some problems with their suggested method of assembling the pocket. They say to used the quarter inch bias tape to encase the pocket edge, and then attach the pocket to the skirt front. This didn’t hold up well for me at all (okay, I admit that I put my car keys in the pocket and that was the end of it!). Maybe that was a bit much hmm? I thought I’d give it a try, but no, too delicate, I should’ve known better…. That left me with a torn pocket, so I had to think about how to remedy that. By this time I was pretty annoyed, both with the fit and the bad construction advice. I couldn’t reattach it the same way because some of the patchwork had frayed from being torn away from the bias tape. I also couldn’t turn the pocket ends under and attach it because there was a noticable stitch line on the skirt from the first stitching. This meant that it had to be reattached in the same place. I decided to go full rustic, and used the mock overlock stitch. Then I decided to do that with the sleeves. I unpicked the hem and overlocked the ends for a complete look of that style.
Here’s how it came out:

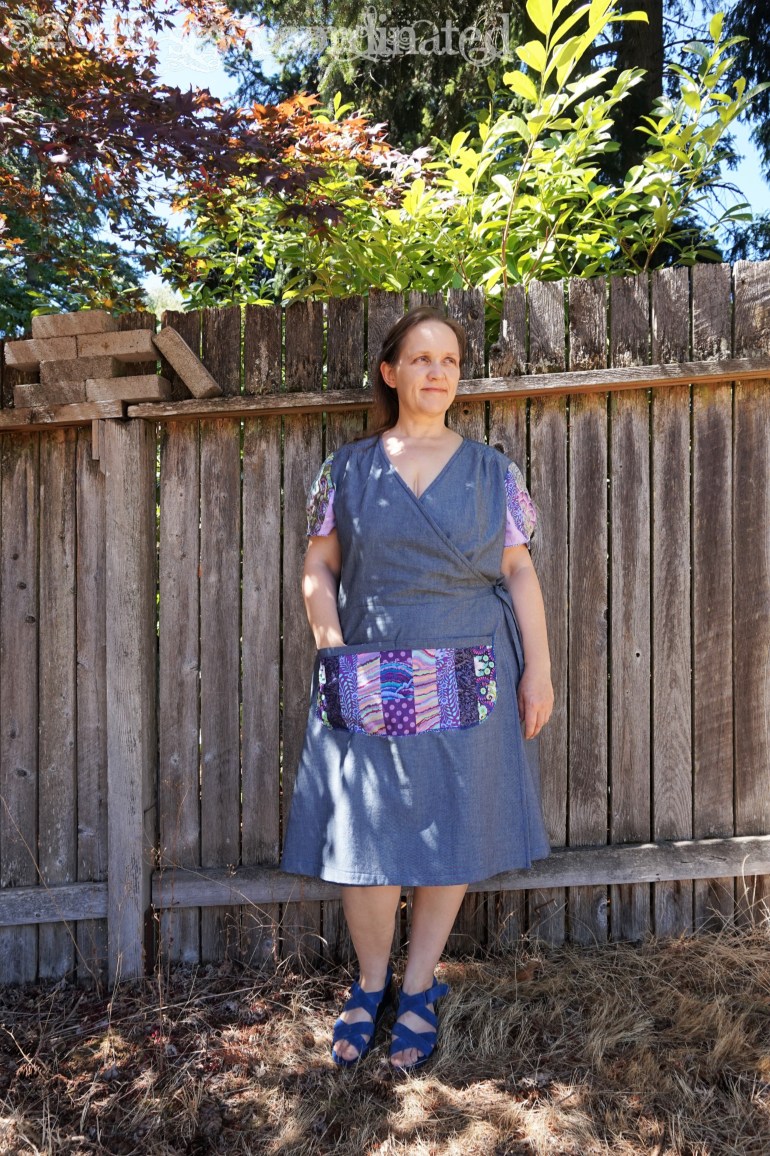
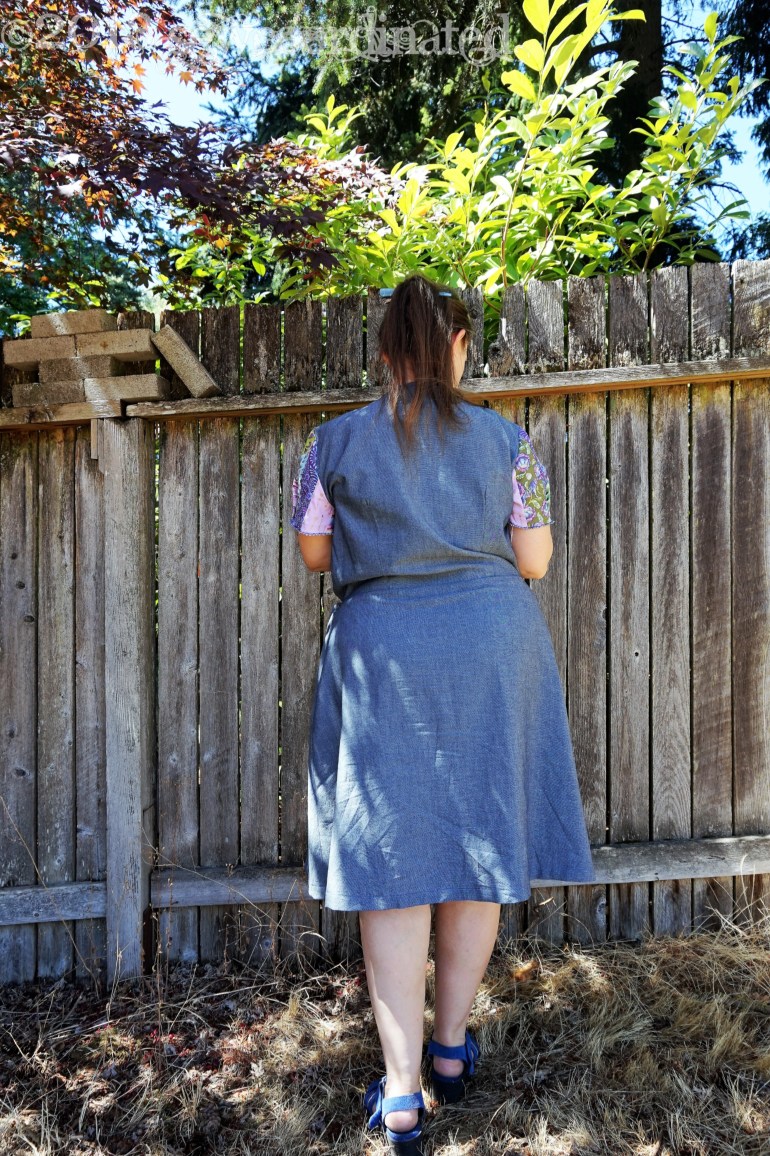
My biggest complaint is the fit of the bodice. The entire dress shouldn’t hike up when I raise my arm to reach for something. It’s clearly too big, and I intend to take steps to fix it. Of course, there’s only limited things I can do at this point to adjust it, unless I’m prepared to take the entire bodice apart, and I’m not. Most of what needs to be fixed had to be addressed before cutting, so I’m gonna have to live with it, however, I do think that some changes can be made to improve the fit. I’ll make another post about that.
My Happiness rating on this pattern: 6.5
Take care and thanks for reading 🙂

I’m having a very hard time with the gathered shoulders. Two sets of gathers? And why do I heed the rectangle piece?
LikeLiked by 1 person
Hi Mx,
The gathers are just part of the design. They create a certain detailed look on the finished dress. The rectangle piece is called a “stay”. It’s used in sewing to reinforce areas that might get a lot of wear. On this dress it’s used to protect and stabilize the gathered stitches. The pattern instructions don’t tell you how to apply the stay. I’m looking at my dress and here’s what I did: After making the gathers I basted the stay behind the gathers (wrong side of fabric, there’s 2 stays you need one for each shoulder), and then I tacked down the gathers on the right side of the dress with 3 lines of straight stitches. The stay will then be in place and will become part of the shoulder and sleeve seams as you finish the dress. I hope this helps. Check out the post that follows: Simplicity 8186 Alterations – It has a close up pic of the shoulder gathers.
LikeLike
Even with all the “ hiccups” your dress turned out wonderful!! Really creative and pretty and it fits you well!!! I’ve been considering whether to purchase this pattern; haven’t seen in about 20 years; I’m also pear- shaped ! I really appreciate your honest reviews! I only hope that if I decide to make this pattern that it will turn out as nicely as your dress but I seriously doubt it!!
LikeLike
Thank you Linda, I hope it works out well for you if you decide to buy it 🙂
Honestly the dress is still large on top for me, I recommend cutting a smaller size for the bodice.
LikeLike
I meant to say ,haven’t seen in 20 years!😆
LikeLike