
In my last post I showed the nearly finished View A of this pattern. I’d determined that the fit was too large, and that I was going to make an effort to alter it. This post outlines the steps I took to correct the fit, and shows the outcome of my efforts.
Problems of Fit
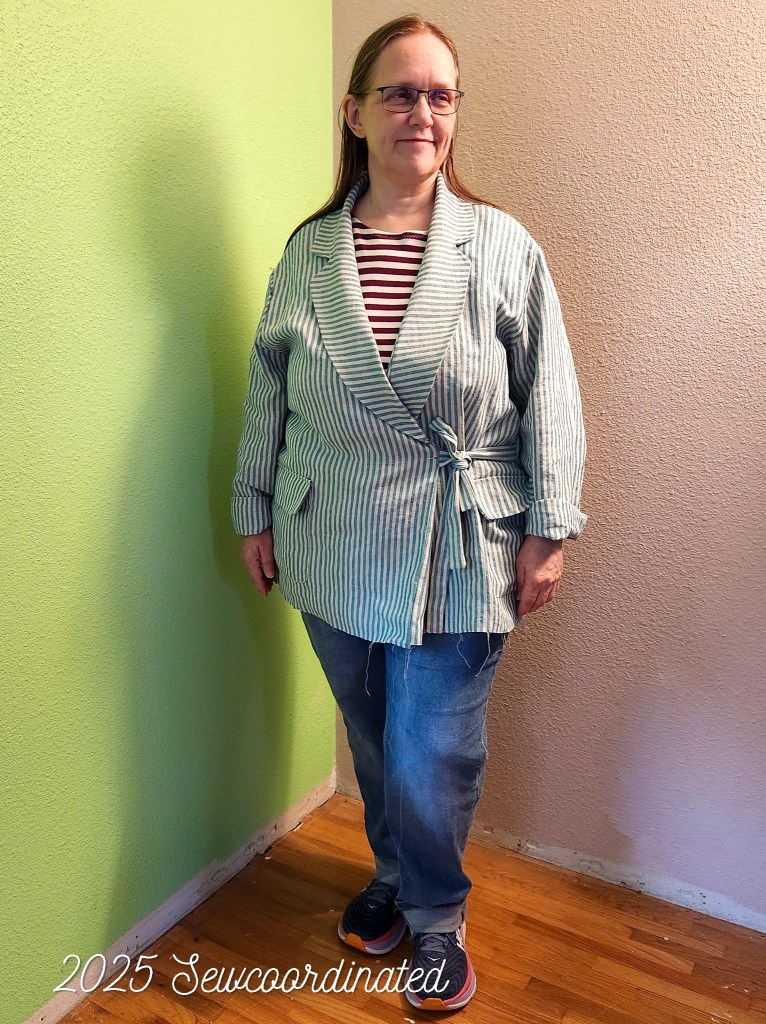
The jacket was large in the shoulders, which caused a sag of fabric on both sides of the front panels. This caused the blazer to have an overly relaxed fit. The sleeves were also quite large. It reminded me more of a bathrobe than a blazer. This was a no-go, and had to be addressed. For reference, here’s a pic of how the first version of this blazer looked:
Alterations Approach & Steps Taken
My first thought was to try to alter the jacket without having to remove the collar, aka take the entire thing apart. I had cut the jacket in size 24 graded to 26 in the hip. I began by removing the sleeves and cutting them down to size 22. I also ripped the shoulder seam up to the collar and cut that down to a 22. I then re-attached the sleeves. I also cut the side seams down to a 22, graded the hips to a 24 and pinned. I then checked the fit. I found it hard to gauge the fit without seeing the entire shoulder seam lowered in size. The collar on this pattern doesn’t change much through the sizes but it does change slightly. This is why I thought that I could alter the jacket without having to remove the collar. But not removing the collar prevented me from grading the whole length of the shoulder seam down a size. In the end I had to resign myself to removing the collar and cutting it down to a lower size. Yes, this meant the undercollar too. I managed to keep from needing to rip the lapel seams, but the rest had to go.
Discoveries & Decisions
It was at this point that I decided to cut the jacket down 1 size further to a size 20. I thought it was doable without ending up a with a jacket that’s too small. This was based on my observation of how the 22 looked with the collar still attached.
Of course, grading down 2 sizes meant that I’d have to move the pockets. They’re very close to the side seam, so their placement is very size dependent. Moving them was non negotiable, it had to be done. This meant moving the pocket flaps AND the pockets themselves. Shout out to my seam ripper for what a steadfast trooper it’s been throughout this entire alteration.
And before I forget, the front facings also had to be cut down to the new size., which meant, that’s right…. more seam ripping 😩
It all took quite a while, with a lot of pondering, but I did manage to take it all apart and put it back together in a smaller size.
The Finished Altered Look
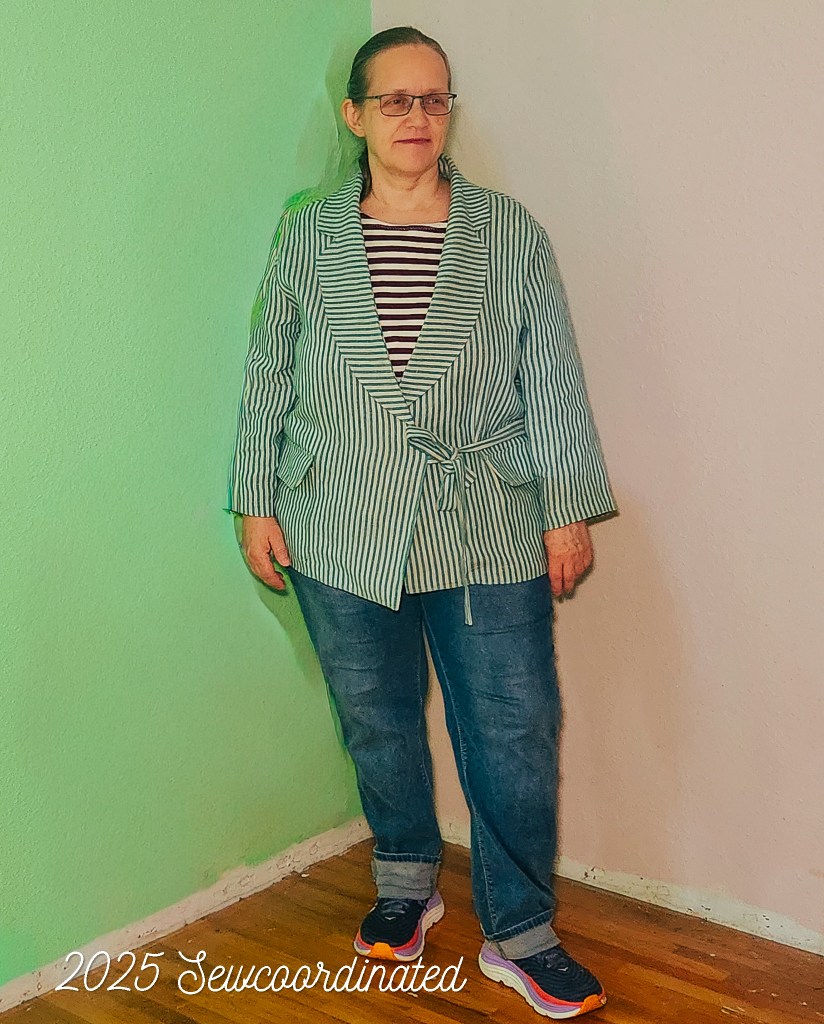
The finished blazer is now a size 20, graded to a 22 in the hips. It has a different fit for sure, which I think is truer to the designer’s intended look. I wore the same exact outfit that I wore in my last post, for the purposes of accuracy in comparison. This is my format when doing alterations:

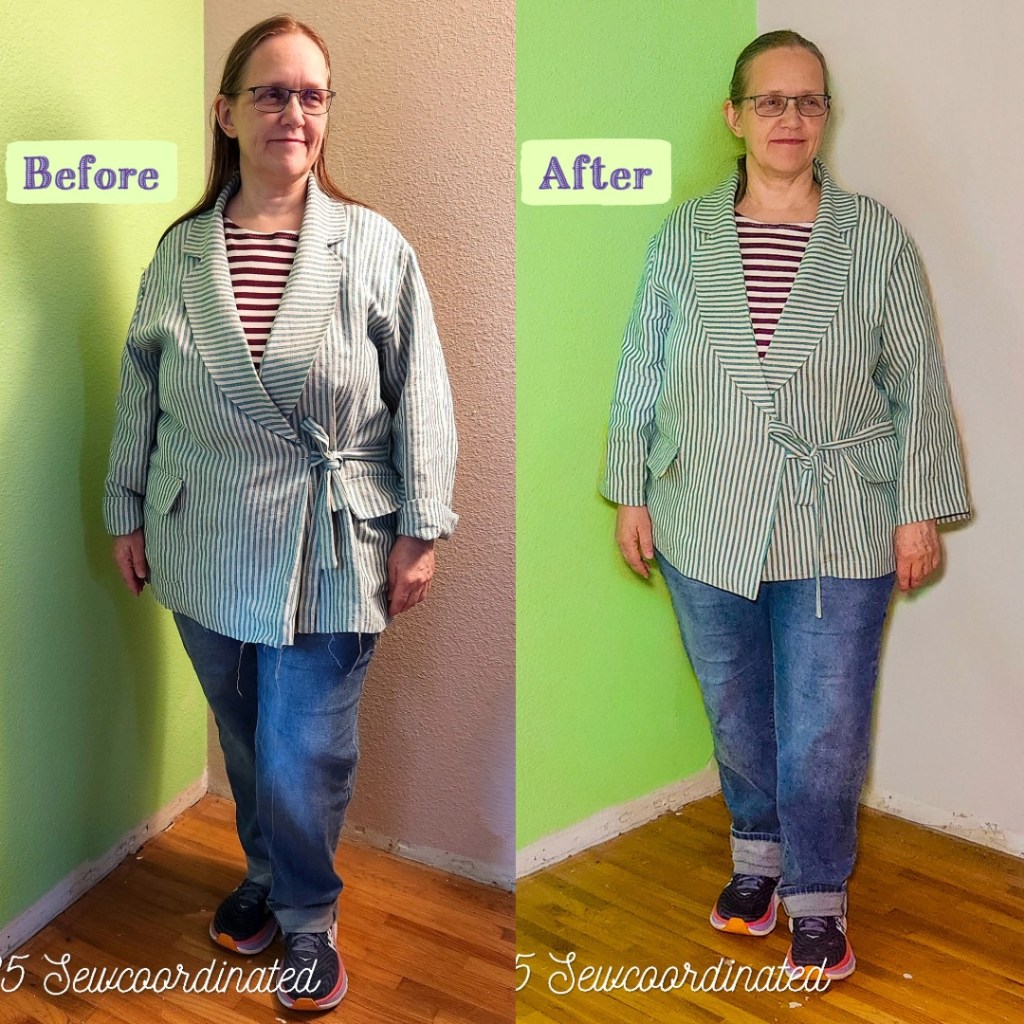
And finally, the side by side comparison:
Final Thoughts
The shoulders on this blazers are huge. If I were to make this again I would do a narrow shoulder adjustment. Even after the downsizing I had to add small shoulder pads to the shoulders. I do think I achieved a better fit, but it was a real struggle. I would measure the pattern next time instead of going by the size chart alone. Lesson learned.
If you’ve read this far, thanks, and feel free to let me know your thoughts in the comments.
