
Today is National Fashion Day here in the U.S.A. The holiday was started in 2016, but I just learned of it today. To celebrate, I’m posting my latest make, a stashbuster tee that I made with my knit remnants.
Some of my best ideas have come from working with leftover pieces of fabric that were used to make other garments. I have a large basket of stretch knit remnants that serve as inspiration to me. Much of the knits are scraps from my makes, some are from outgrown children’s clothes.
Why A 3/4 Sleeve Tee?
It’s summer right? Why the nearly long sleeve shirt? The weather where I live has long cold Springs. The 3/4 length sleeve really has a place here. For times when a long sleeve is too warm but a short sleeve tee is too cold, the 3/4 is just right. I find the 3/4 sleeve perfect for the seasonal transition between summer/autumn too.
The Self Drafted Pattern & Fit
I took an old long sleeve bought from a store and copied it as best I could. It was a very well worn shirt, and copying it was a bit risky. The knit fabric may have stretched over time, warping the original pattern (my opinion). I went ahead and copied it anyway! My copy was a rough draft because the shirt was old, so my copied pattern might not be true to the original. I did run into a problem of fit, and had to modify the garment to make it fit me properly. The problem was that the shirt was too small in the hip area. I needed more room in the space between the waistline and the hem.
Solving The Problem of Fit
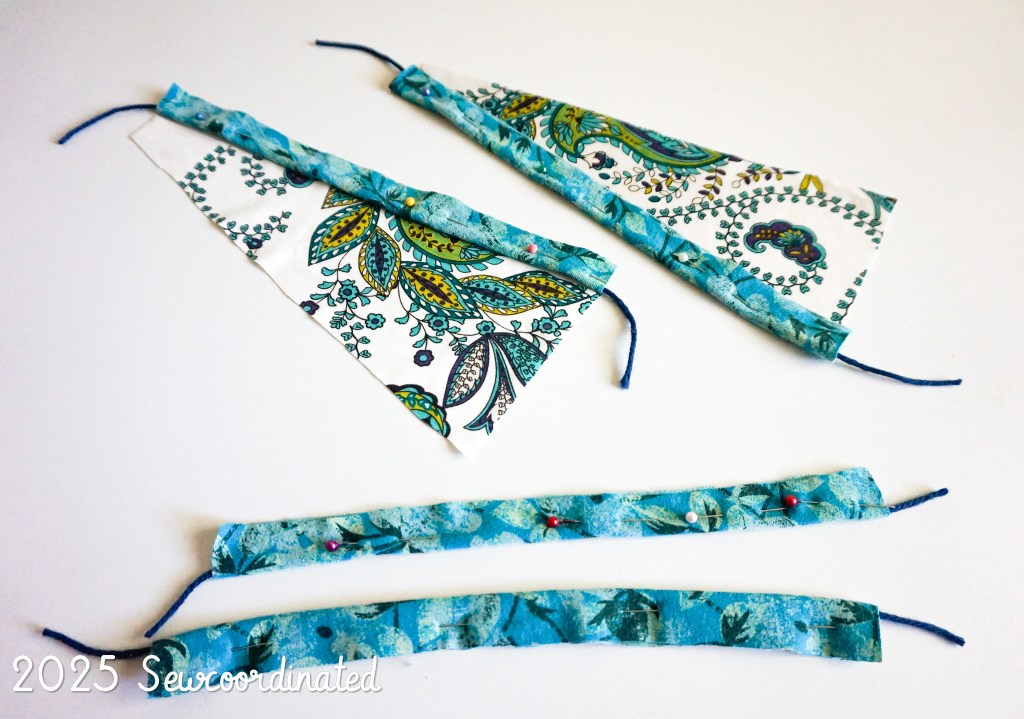
I didn’t fret too much about the problem of fit described above. It wasn’t a major problem, like the chest and arms not fitting properly. Both of those fit fine. Being that this shirt was one of my scraptastic upcycles, all I had to do was add some fabric to enlarge the hip area, and the problem would be solved. I chose to add contrasting fabric godets. What’s a godet? For those who don’t know: It’s a triangular piece of fabric inserted into a seam to add flare and drape. Here I’m using it to increase the size of my shirt. It works well for that application too. I slashed the side seams to the start of where I needed room, and inserted the godets. Well, it wasn’t that easy, but only because I chose to get fancy. I decided that piping would look nice alongside the godets. That made a fairly simple process more complex and time consuming. I’ve gotta have my fashion though! :
I also went all out on the sleeves:

I didn’t have enough of the paisley fabric for 1 lower sleeve piece (only had small scraps of it). To remedy I used 2 pieces for each sleeve and inserted a piping. I finished the sleeve with bias binding of the main fabric.
And the finished shirt:


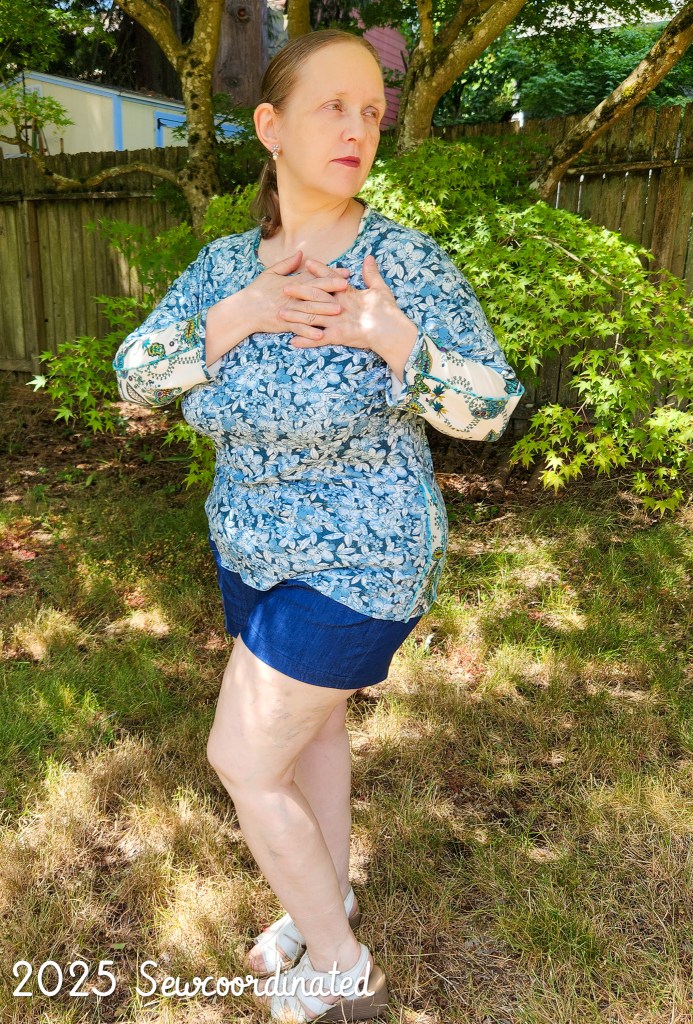
I chose an unconventional finish for the hem. I was happy with the length of the shirt and didn’t want to shorten it. Instead I just mock overlocked the raw edge and was done 🙂
I’m happy with the fit and this make. I think I’ll get a lot of mileage from it!
