Here’s a project that had been on my to do list for a long time : replacing the broken blinds that were there when we moved in. The blinds covered a window on the door in our kitchen. Here’s what they looked like:

And a close up:
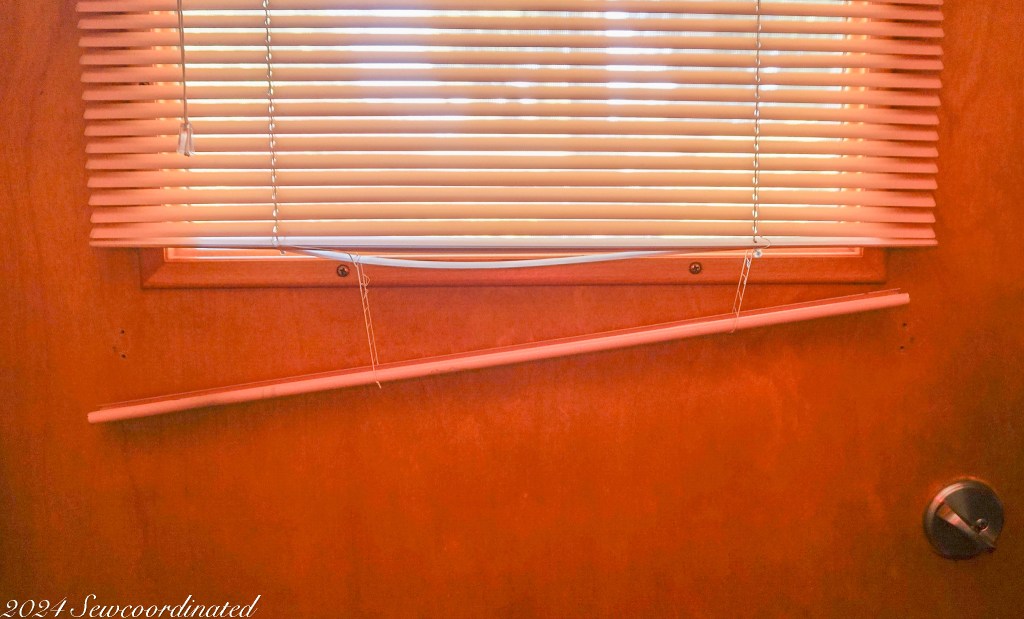
One of the reasons we didn’t replace these sooner was because there’s nothing functionally wrong with them, they work fine, with the exception of the dangling bottom bar. It’s not a big deal when the blinds are down, but when they’re say….halfway up to let light in, that broken bar starts to look pretty bad.
I thought about what kind of treatment to replace them with for a long time. I decided that I wanted to make use of material that I had on hand, and buy little to nothing if possible. In other words, spend close to zero bucks to make this.
Methods and Goals
I had a leftover piece of fancy home decor fabric that I’d special ordered from Joann’s a few years back, that I used to make pantry curtains out of (never got to blog about them). I knew that I wanted to use that fabric on whatever treatment I decided upon.
An important consideration was how to hang the window treatment. The blinds had their own brackets in place, so I decided to keep them there and reuse them somehow. Here’s 2 close up pics of the brackets:
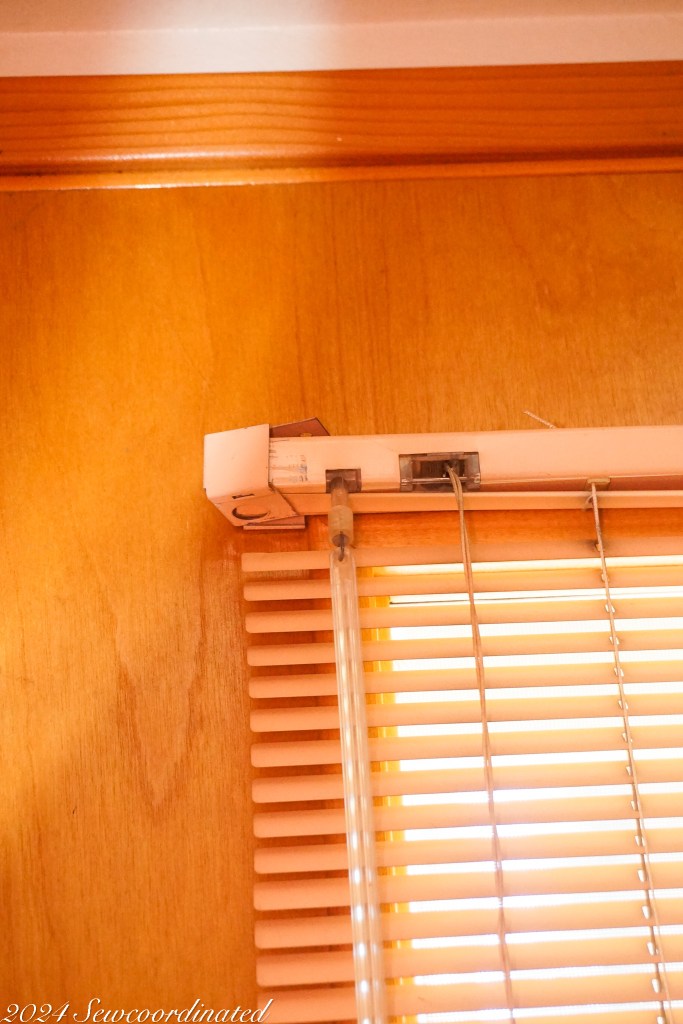
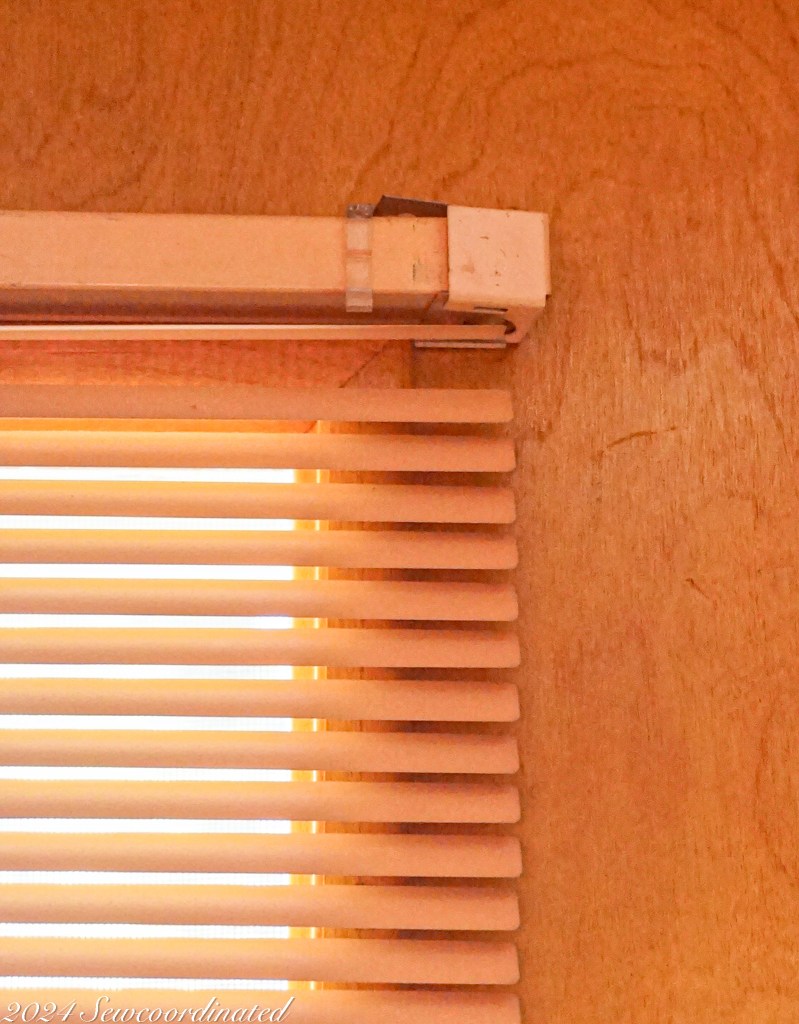
Just some really basic metal hardware. Again I kept it simple and bought a spring tension rod to hang between them. The 2 main elements of this window treatment:
Or 3 if you count the lining fabric. It’s a white quilting cotton that I had in my stash. I decided to line the curtains because they’ll be installed in a west facing window that gets a lot of sun during the spring and summer. I want to protect the main fabric from sunlight degradation. I can always replace the lining but not the main fabric.
Materials Used
Here’s a list of the materials I used to make the curtains and cornice:
- Home Decor Fabric
- Lining Fabric ( I used quilting cotton)
- 1 Spring Tension Curtain Rod
- Clip-On Curtain Rings
- Thread
- A Scrap Piece of Corrugated Cardboard (I got mine from a packing box for a heavyweight item)
- Double Sided Foam Tape
- Stick On Velcro
The piece of fabric I used for the curtains was a remnant, as was the lining. Fabric amounts vary based on window size.
Sewing the Curtains
I had a limited amount of fabric to use. In fact, it was just enough to make these, with 3 semi-long strips left over, from which I fashioned the curtain “ties” (more on that soon) and the cornice cover. I have to say that it worked out perfectly as far as using every last scrap was concerned. That’s not always the case so I think it’s worth noting 🙂
I just made a couple of single hemmed panels, nothing complicated. The hems aren’t double folded, there wasn’t enough fabric for that. I just finished the raw edges with a mock overlock and hemmed in one fold.
The Lining
I consulted an old sewing book for guidance on how to do this:
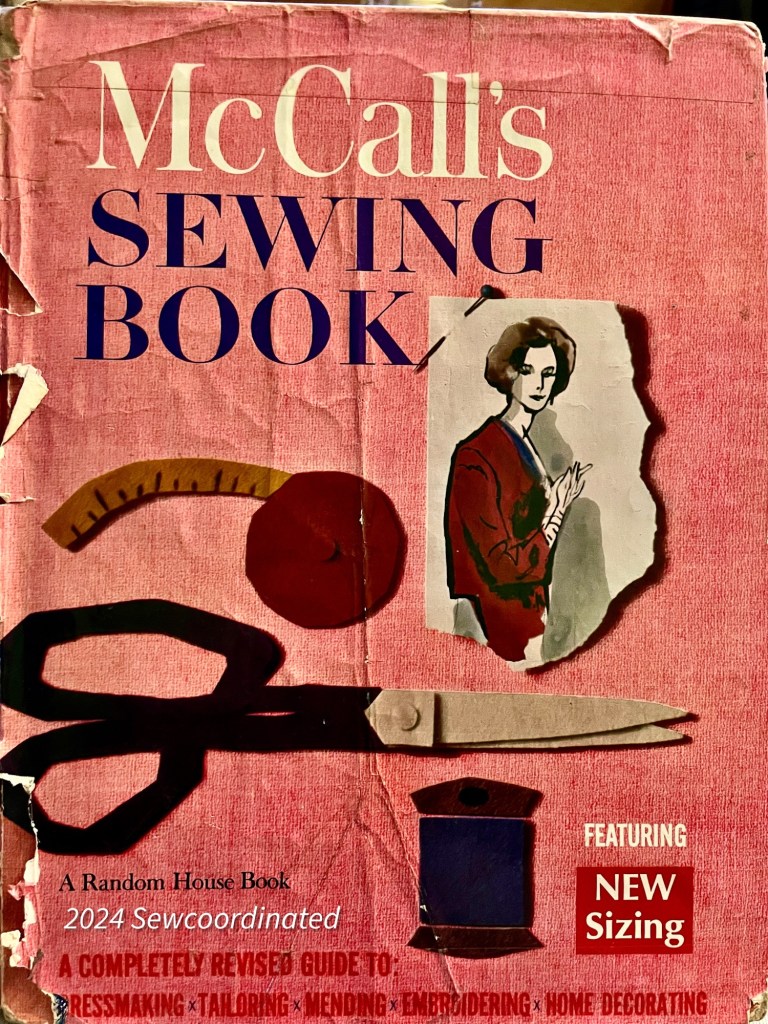
The very last chapter in this book is on home decorating, 25 pages out of the 300 that make up a book nearly completely devoted to clothing construction. Navigating the old style drawings without the aid of zooming in with a pinch of the fingers was something. It still has a lot of useful info, even with the rough tech drawings. At least they’re larger in size than a sewing pattern’s. Definitely a helpful blast from the past, it confirmed what I thought I needed to do, which was to cut the linings a bit smaller than the curtains.
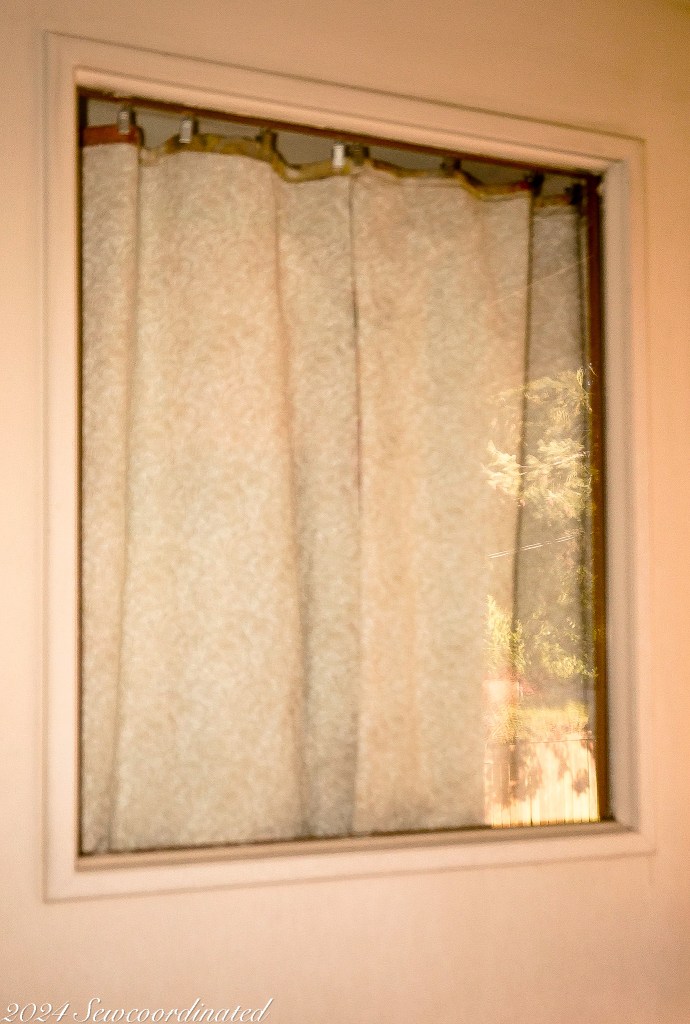
Here’s the lining side of the curtains, taken from outside once they were hung:
The “Ties”
The matter of tiebacks for these curtains was an issue. Since the curtains are hanging on a window that’s a part of a door, there’s no way to use a traditional hook and fabric loop arrangement. Yet the limitation of the curtains in comparison to the blinds was something I wanted to change. I was hoping to give them more versatility than just opening and closing from side to side. Blinds had a big advantage in this way, because they can be adjusted to let in many different amounts of light. I wanted to improve the ability of the curtains to do that too. I came up with the idea of curtain scrunchies. Just like the ones used for hair, they have elastic and hold themselves onto the curtains without the need for additional hardware. Here they are:
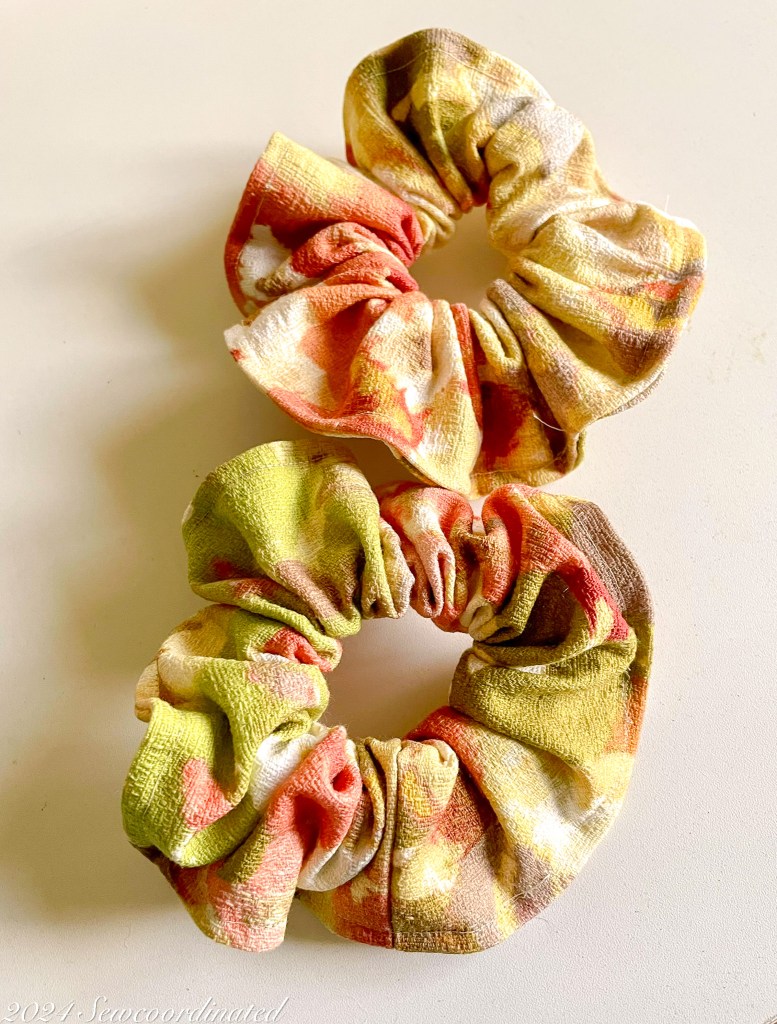
It wasn’t easy getting the elastic equally balanced, and it did proved to be a challenge. I had to adjust them a few times, but I’m fairly satisfied with the look they create.
Curtain Rings
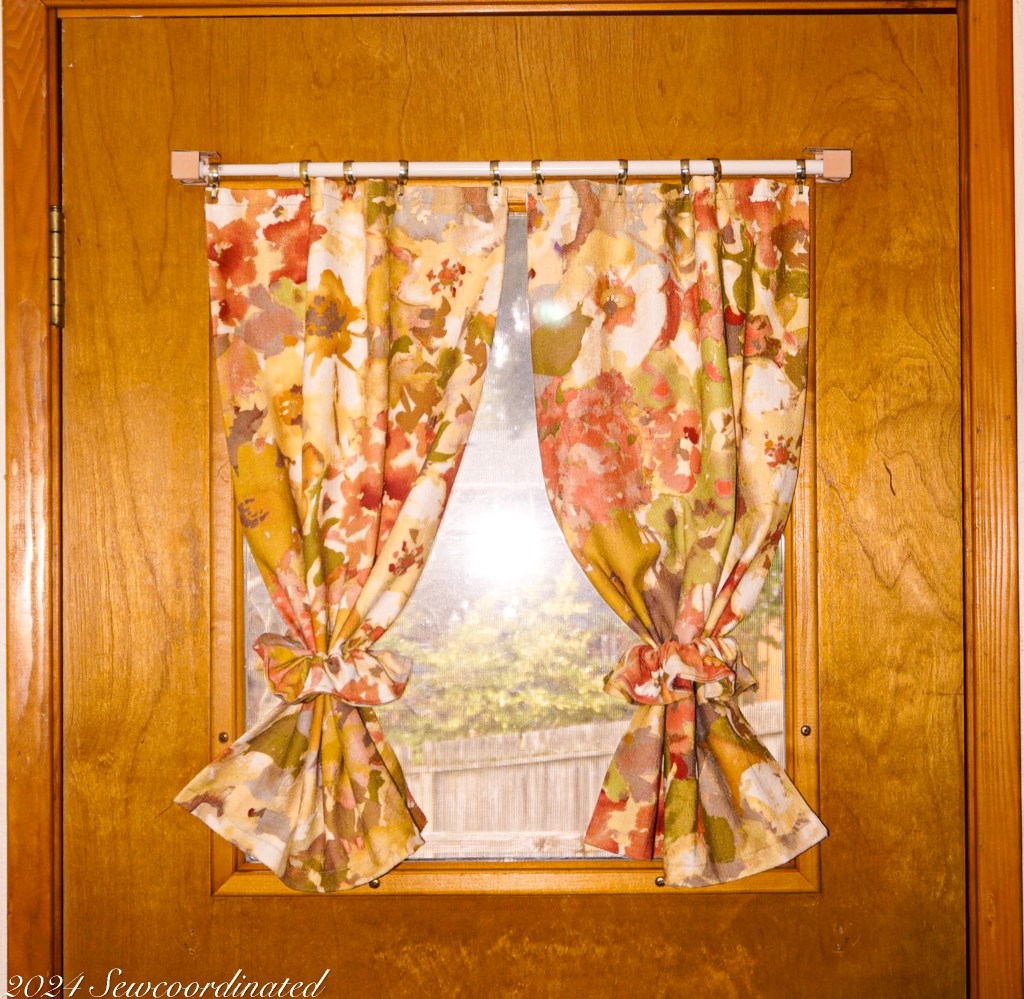
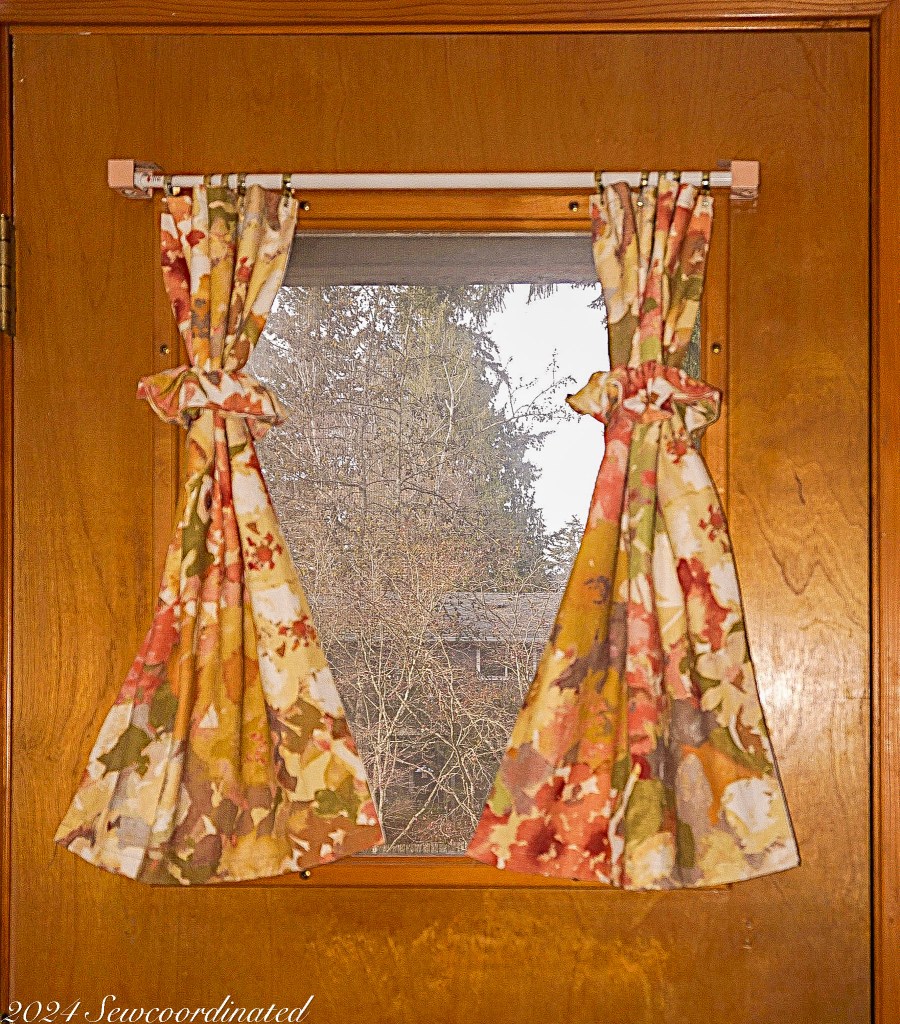
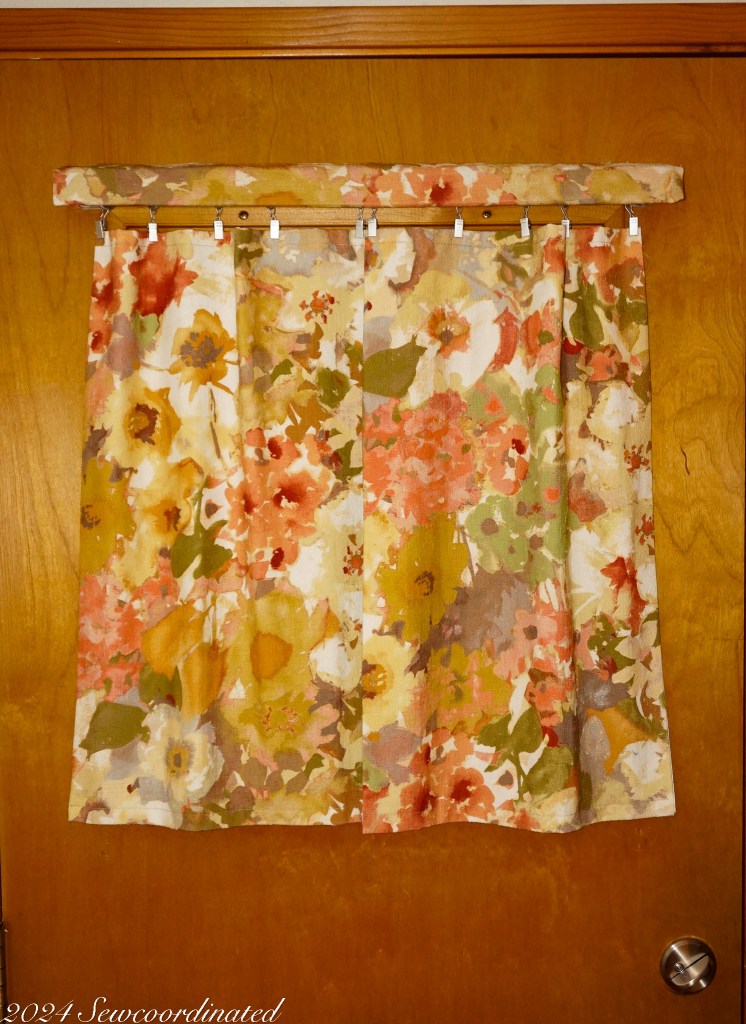
At first I used gold pinch pleat rings that I had on hand. Most of the styled pics show the curtains with those rings. Later I switched them out to silver clip-on rings, because they allow the curtains to hang a bit lower, which I thought was needed. They weren’t quite clearing the wooden frame of the window with the pinch pleat rings. Now they do. Here’s a pic with the first set of gold rings:

Styling Pics (with the pinch pleat rings)
I had a lot of fun thinking up ways to style my new curtains with the scrunchies. These pics were before I changed the rings:
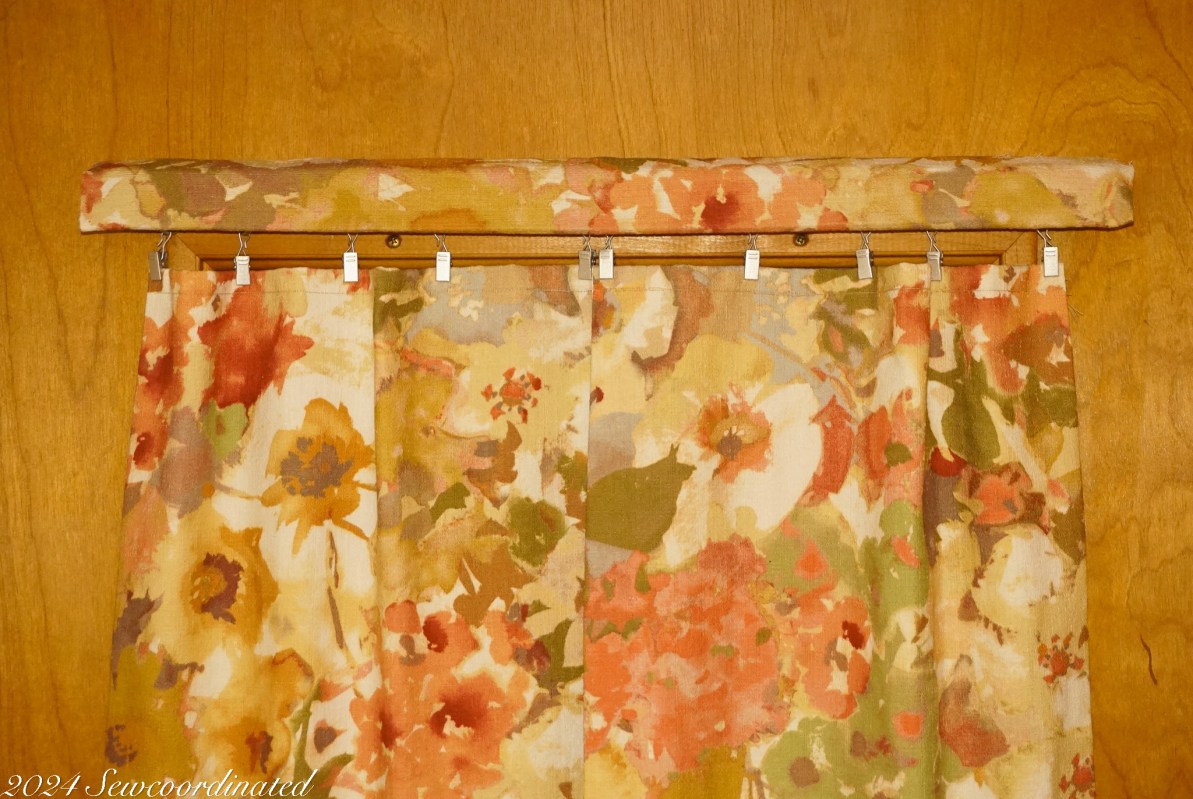
The Cornice
The idea to make a cornice was an afterthought. It was purely for looks, to cover up the old hardware brackets mostly, but also the curtain rod while I was at it.
A cornice is a word with 3 different meanings, 2 of them architectural. The 3rd is related to drapery and is “a projecting, decorative strip above a window, designed to keep a curtain rod from showing”.
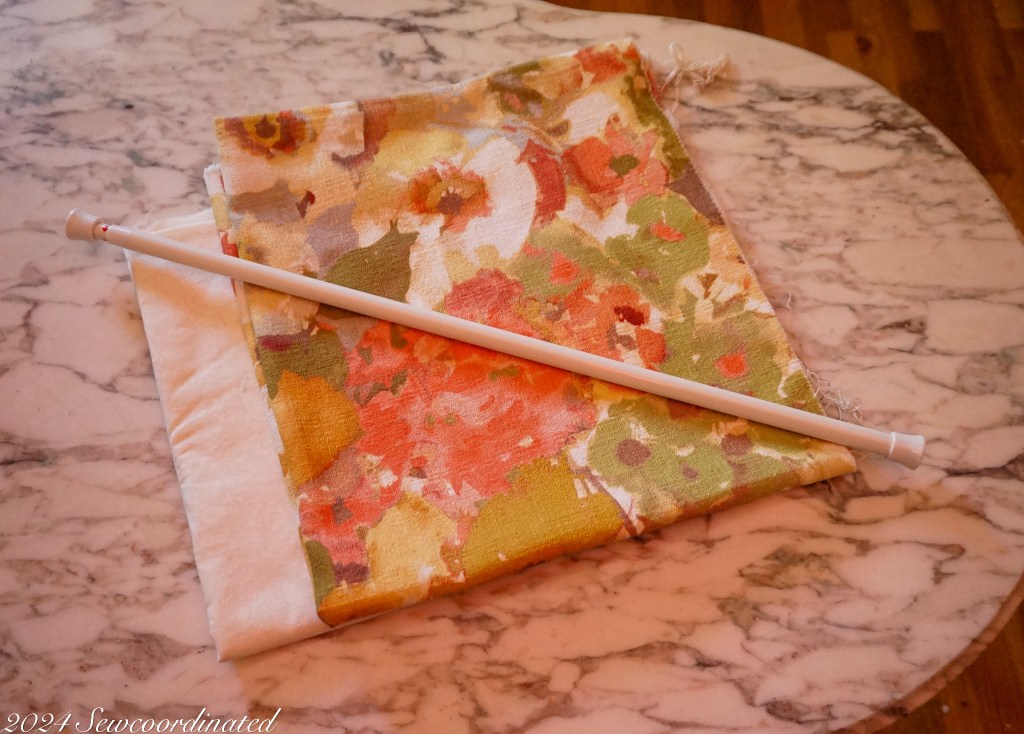
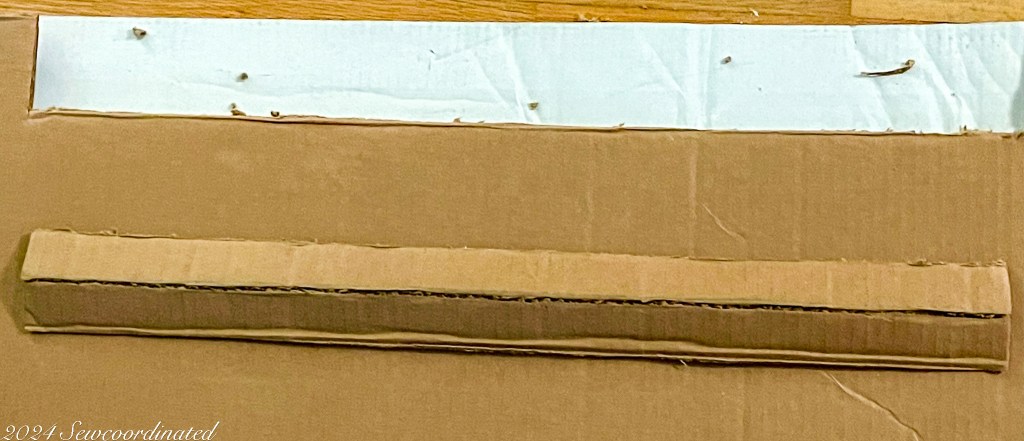
A cornice is usually made from wood. I didn’t want to do carpentry here, just find a way to cover the things with the last piece of fabric I had left. I have a lot of corrugated cardboard, I thought it might be sturdy enough to fit the bill. I made some measurements, and cut out a piece:
Another pic:

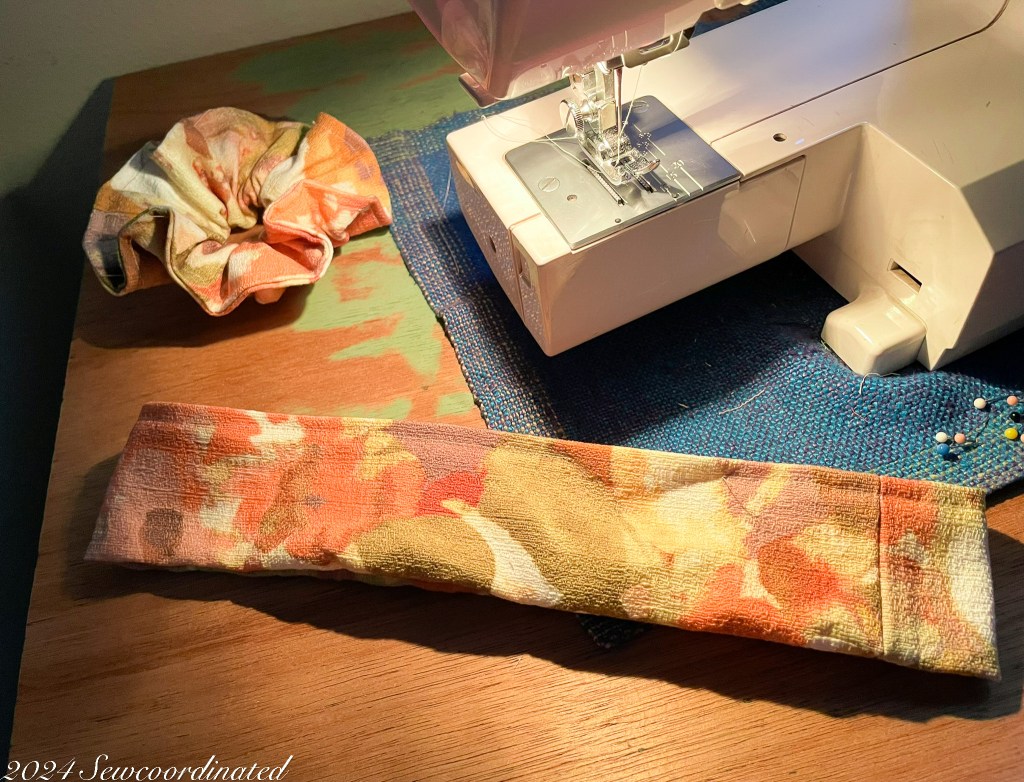
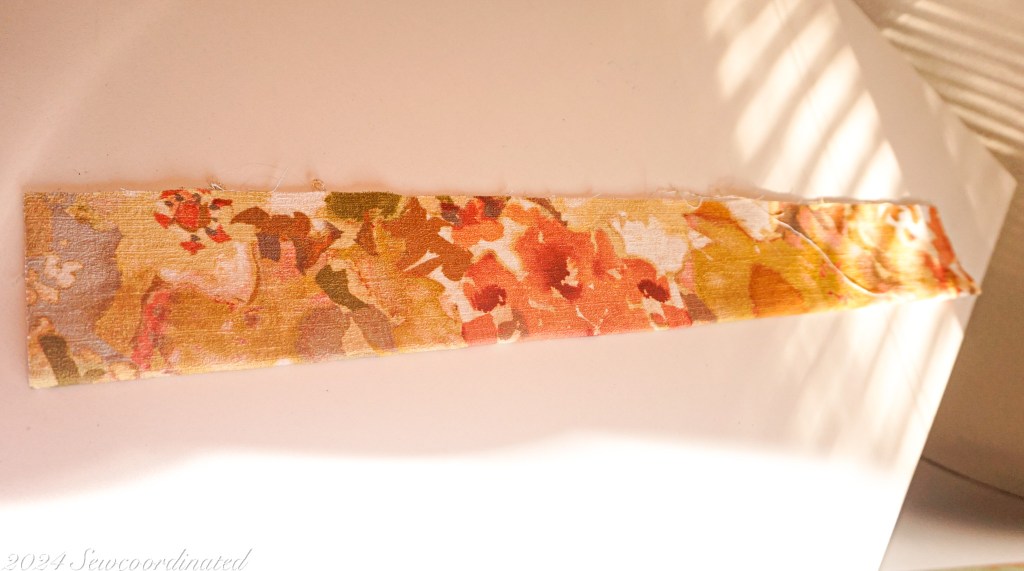
I scored it straight down the middle, because I needed for it to bend. Corrugated is perfect for this because it has 3 layers. Then I took my last remnant of fabric and made a casing:
The final step was to attach the cornice over the hardware. I used double sided tape and sticky Velcro for this. It was a fiddly process that required some patience, but I got it done. At some point I plan to super glue the Velcro onto the brackets and sew the Velcro onto the casing, because I think it would be battened down better and lie flatter that way, but for now I’m satisfied with it.
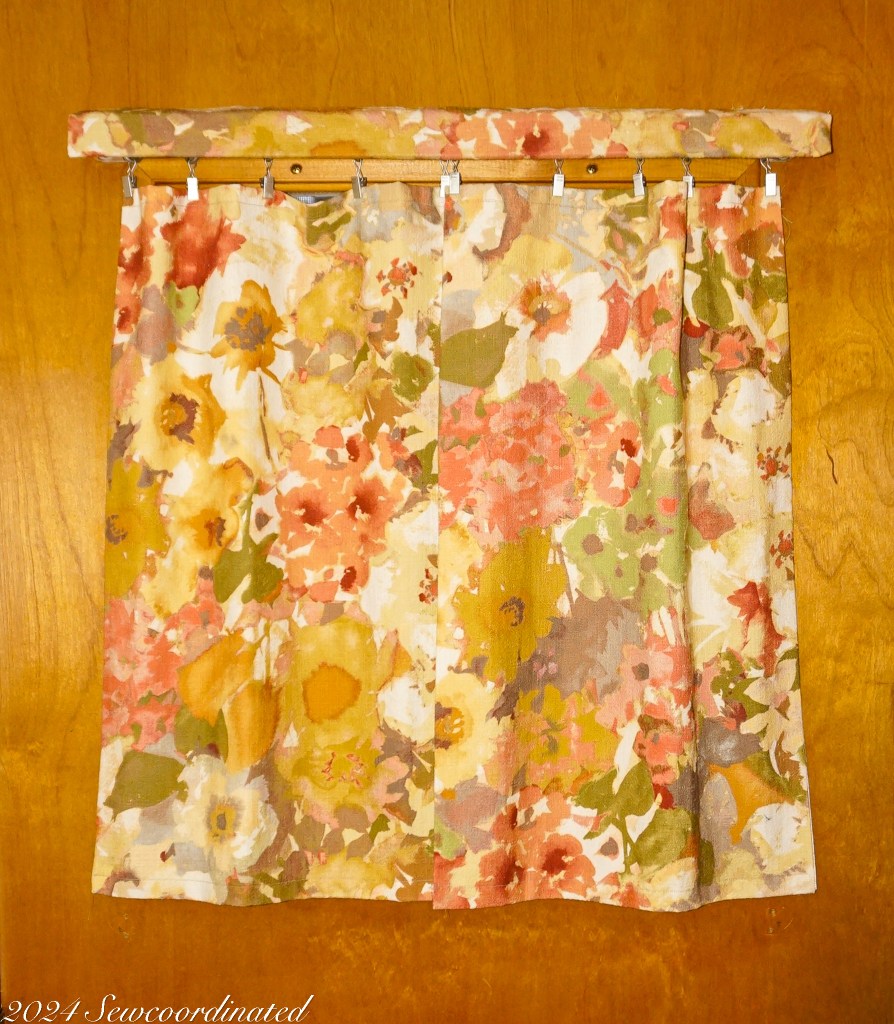
Finished Look with Cornice
And here’s the final look, sans the hardware:

As I mentioned earlier in the post, my objective was to complete this window treatment on a shoestring budget. I did manage to do that, because the only item I had to buy was the curtain rod. I bought it at Daiso for about $3 – 5. The rest of the materials I had on hand, which was another goal of mine: to use things I already had.
It’s good to see this window finally get an upgrade.
If you read this far, TY, and I hope you enjoyed this post.
