Continuing the conversation from my last post on pants/shorts sewing, I’m now showing the alterations I made to the shorts shown in my previous post.
The problem with the fit was that the shorts were still too big, especially in the waist. I had already remade the shorts once, so doing that again wasn’t an option, but I had to do something to improve the fit. After giving it some thought, I decided to focus on just altering the waistline, which was where the main fitting problem was. Fortunately, this pants design is very alterable in the waistline due to having both front pleats and back darts. I deepened all 4 by taking them in. This would downsize the waist without having to rebuild the shorts entirely.
Process and Method
Now while this alteration wasn’t a total rebuild, it did involve a fair amount of work. Accessing the darts and pleats meant unpicking the waistband facing and then marking and stitching a new line 4 times (2 darts, 2 pleats). Then the fit had to be checked and any changes needed had to be made from there, which did happen. I had to reshape the back darts more than once. The front pleats went well on the first try
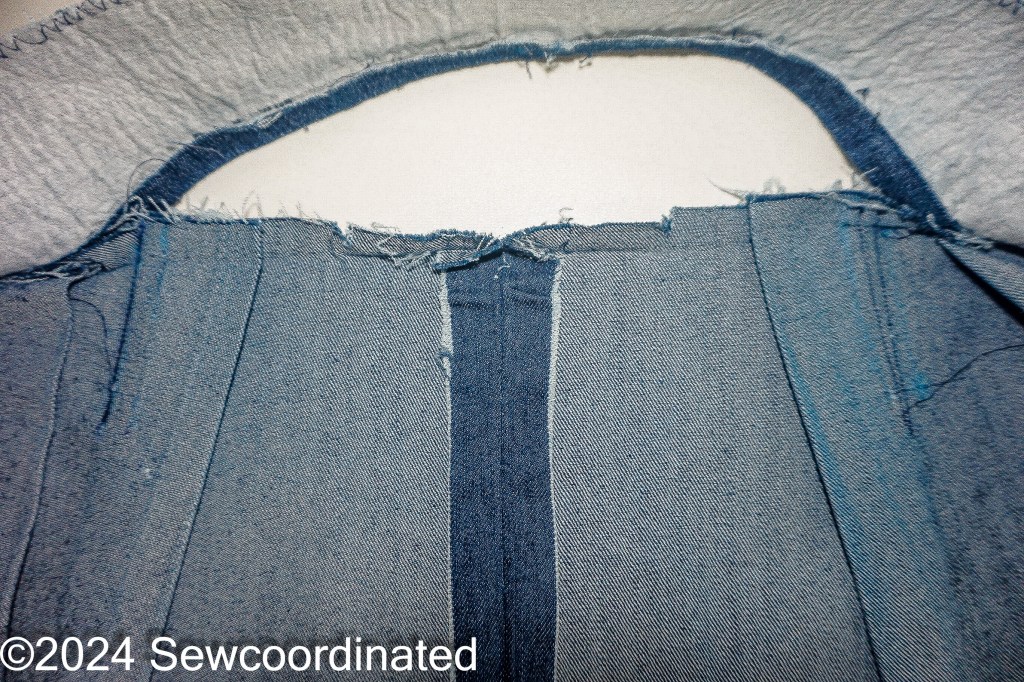
As mentioned above, I began by unpicking the waistband facing:
This gave me access once again to the darts and pleats. I picked one open, in order to better estimate the increases I needed to make, and to make a freshly stitched dart, but I realized that it wasn’t really a necessary step.
I could simply stitch beyond the original stitch line with my intended increase without having to unpick; it isn’t as pro because it leaves the original stitching in place, but it saves a lot of time.
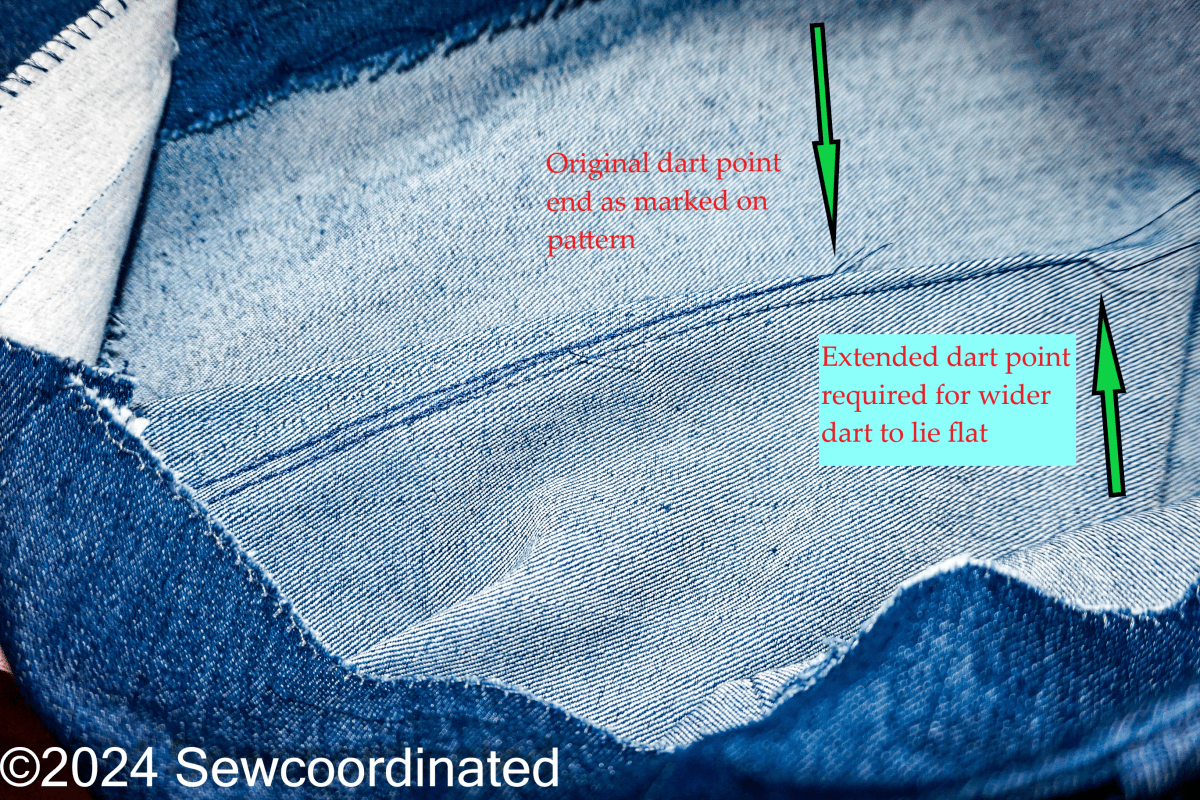
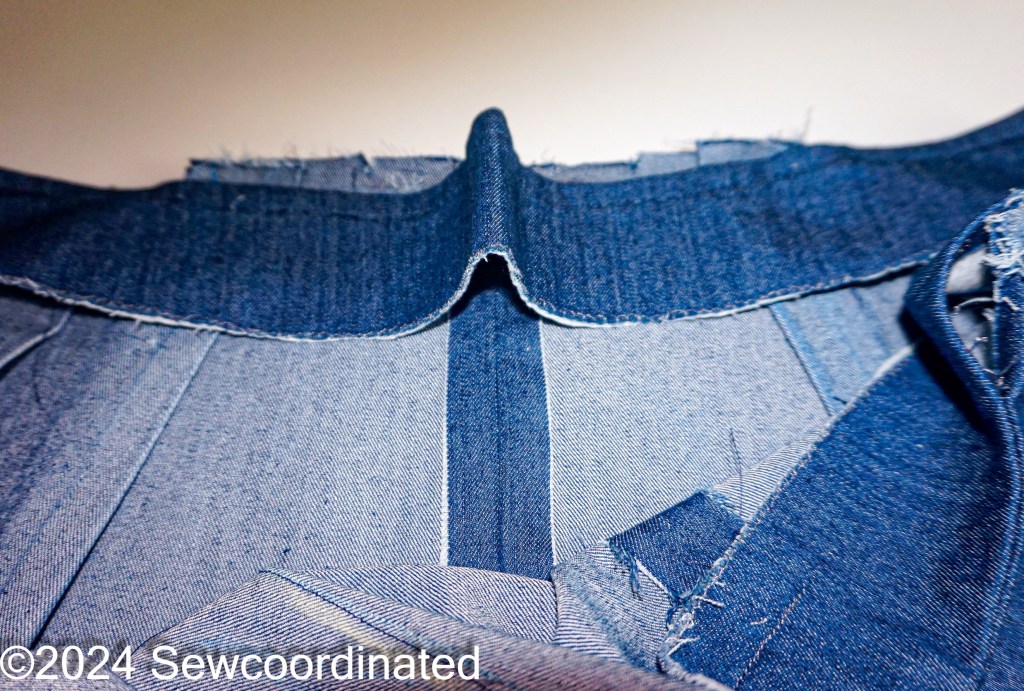
I increased the dart mostly at the top near the waist. I was hoping to get the decrease I needed without disturbing the lay of the dart, and by that I mean how it makes the garment lie on the body in a smooth and flat way without puckering.
They were good on the first increase, but when I decided to increase again for a better fit, the dart was puckered when I tried the shorts on. It was a little ballooning area that puffed upward where it was supposed to be flat. I wish I’d taken pics of the shorts at this stage, but I was too busy thinking of how to fix the problem. I’d worked on these shorts for a long time, and just wanted to see them become better fitting and wearable again.
I realized that I had 2 choices to make the puckering disappear:
1. Unpick the 2nd stitching, or
2. Keep altering.
I chose #2, because I liked the waistband fit and didn’t want to lose it, and also don’t like seam ripping very much!
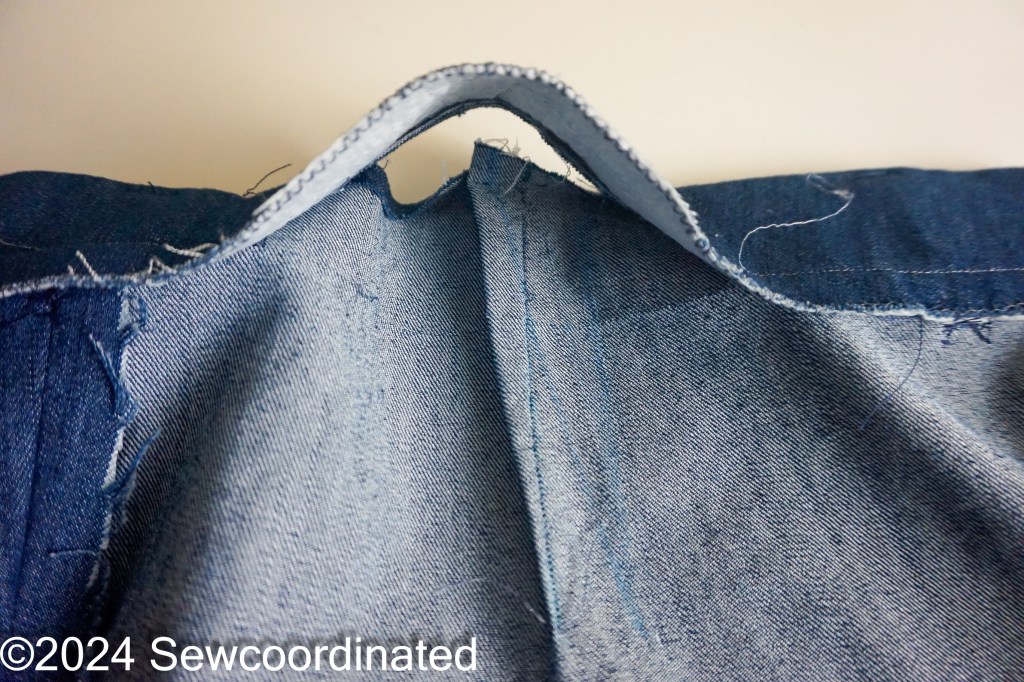
So how did I get the dart to lie flat again?
I stitched further down along the extra width that I’d made and lengthened the dart to ease it out. This worked, and the dart was once again lying flat:

For the front pleats all I had to do was re-stitch further in and the fit improved:
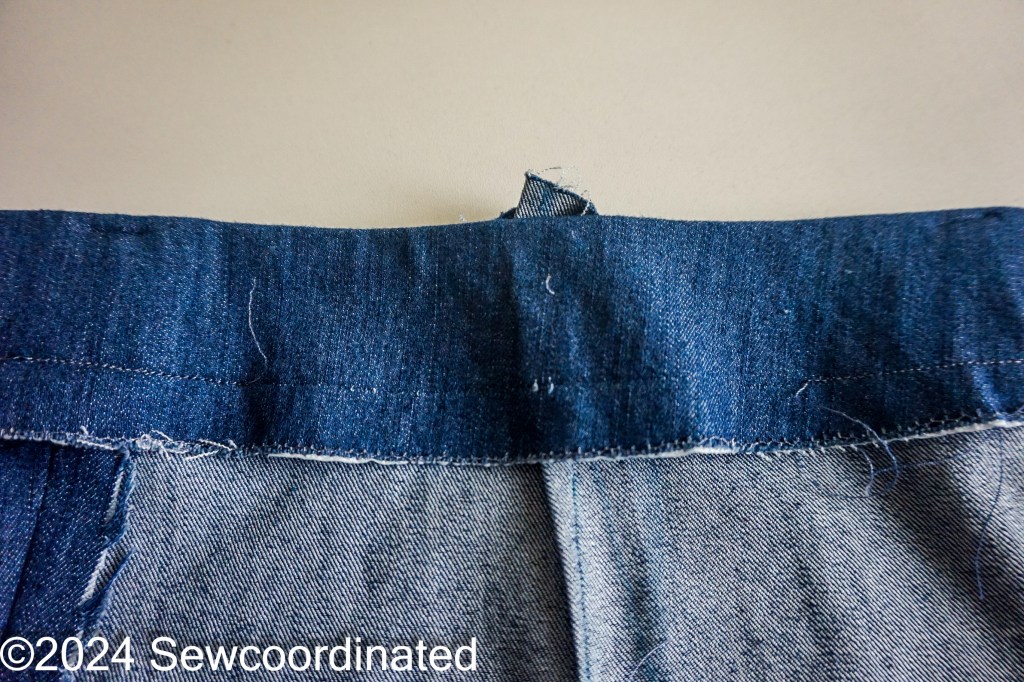
After the darts and pleats were deepened, there was one more problem to deal with. That was the problem of the waistband facing now being too large, or long once the waistline became smaller. You can see that in this next pic:
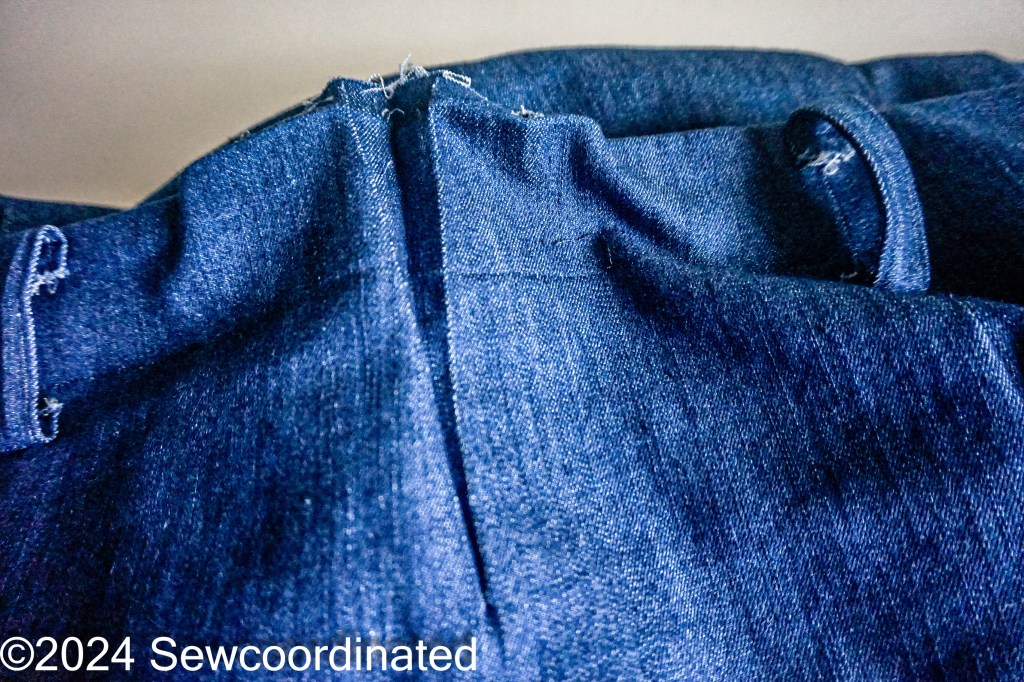
This was an issue in both the front and back alterations, and rather than unpick the entire facing and cut and interface a new smaller one, I did the following:
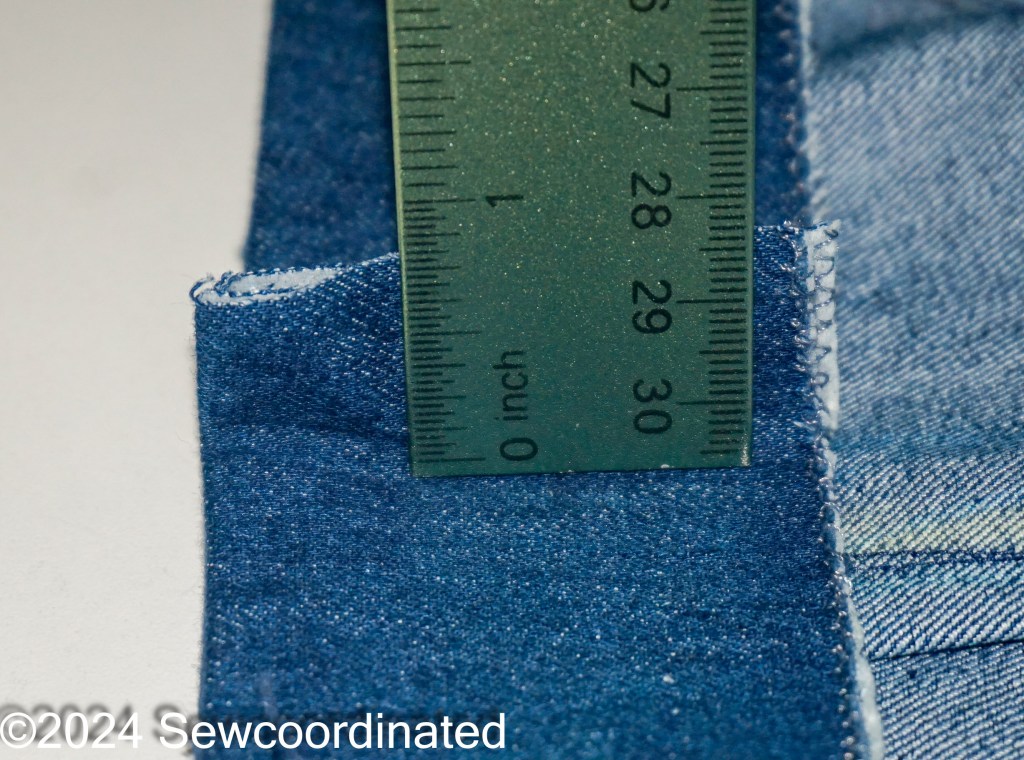
I cut the loop of the excess down the middle, stitched it together, ironed it down, and re-attached it to the waistband. I did this for both front and back.
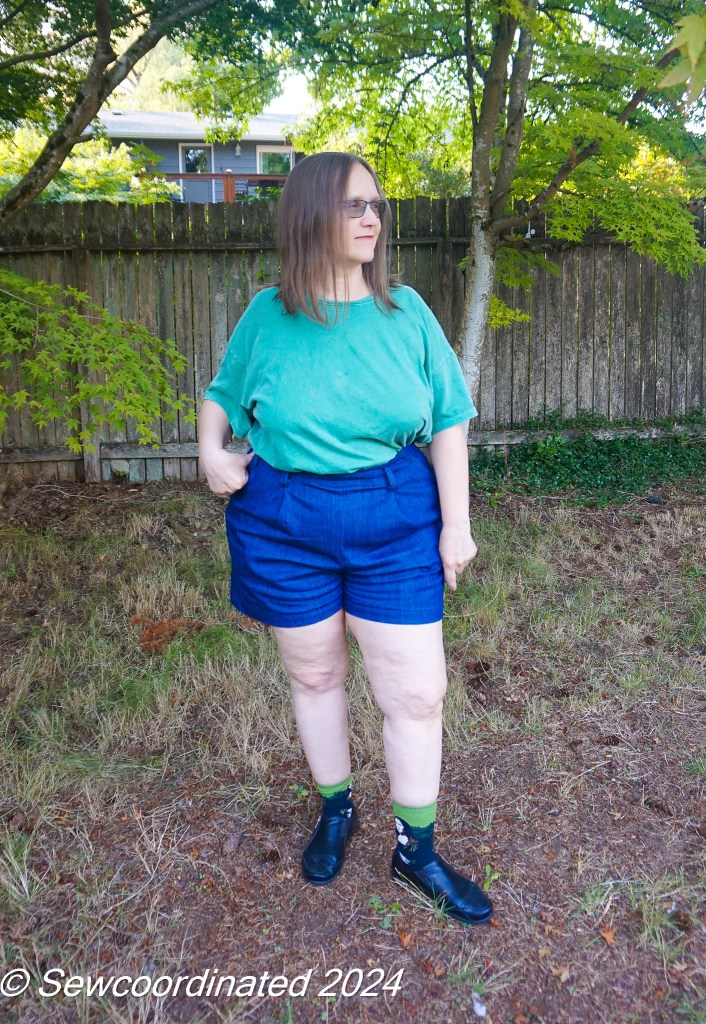
Well, the proof is in the pudding right? Here’s how they fit now:
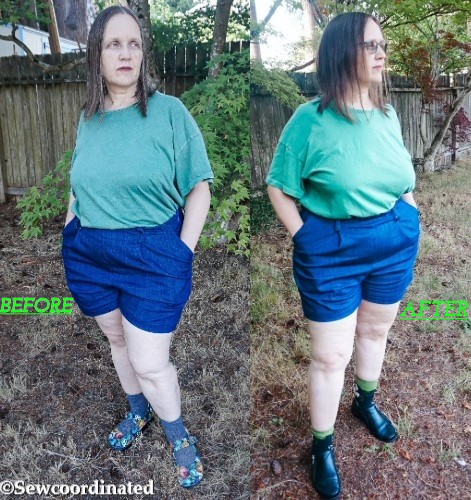
And some individual pics of the altered fit:

If you’d like to compare the earlier fit, it’s the previous post of this one. There’s several pics there both with and without a belt. When I realized that they wouldn’t sit at my waist without a belt, I knew I had to alter. I don’t think that these are designed to be a “boyfriend” or “girlfriend” fit.
Recap/Summary
I went through several stages to get the right fit for this pattern. It’s a tailored design that requires a precise fit. It had been awhile since I’d made a pair this fitted, but they did give me a lot of practice in my pants fitting skills. Here’s a summary of everything I did to get this pattern to fit my figure:
- Drafted the back piece with a full seat adjustment in size 22/24. Shorts were way too large.
- Redrafted the pattern back in size 20/22 with FSA. Made a muslin and thought the fit was right.
- Took the shorts apart and recut them in the new size. Found that they fit but were still large in the waist and had a slouchy fit because of this.
- Took the shorts apart at the waistline and took in the front pleats and back darts to improve the fit in the waist. Cut and stitched and reattached the now too large facing to match the new smaller waistline. Achieved an acceptably good fit finally!
I’m happy that I got these fixed in time as shorts season is definitely over, and the season is changing quickly. I’ll pack these away with my summer clothes, knowing that they’ll be ready for next season and that they fit me well.
After all that I once again redrafted the back piece, this time in a 3 size grade of 18/20/22 with a FSA and crotch line extension. This time the altered pattern piece is to make the pants, and I’ll make another muslin to check the fit. I’d really like to see how the pants look in this pattern, and hopefully I’ll have some time to get around to that.
So what do you think of my alterations? Do you like the earlier fit or the altered one?
If you’ve read through all of this, thank you and I hope you got some alteration tips and inspiration! Pants fitting isn’t always easy but it is possible 🙂
