I mentioned in my last post that I was unhappy with the fit of the bodice on this dress. I said that I was going to try my hand at altering it for the sake of a better fit… Well, I followed through with my plan!
If you read my first post on this pattern, you know that I realized that I should’ve cut the bodice 1 size down, shortened the torso for my petite figure, and a narrow shoulder adjustment. The fact that I couldn’t re-cut the bodice and had to work with what’s already been done left me with only a couple of alteration options.
Here’s what I did:
First, I cut off the neck binding I worked so hard on:

Seriously, I couldn’t believe I did that, but I really wanted a better fit!
My reasoning was that cutting the front neckline down would be like having the new edge at the place it would’ve been had I cut the bodice 1 size down.
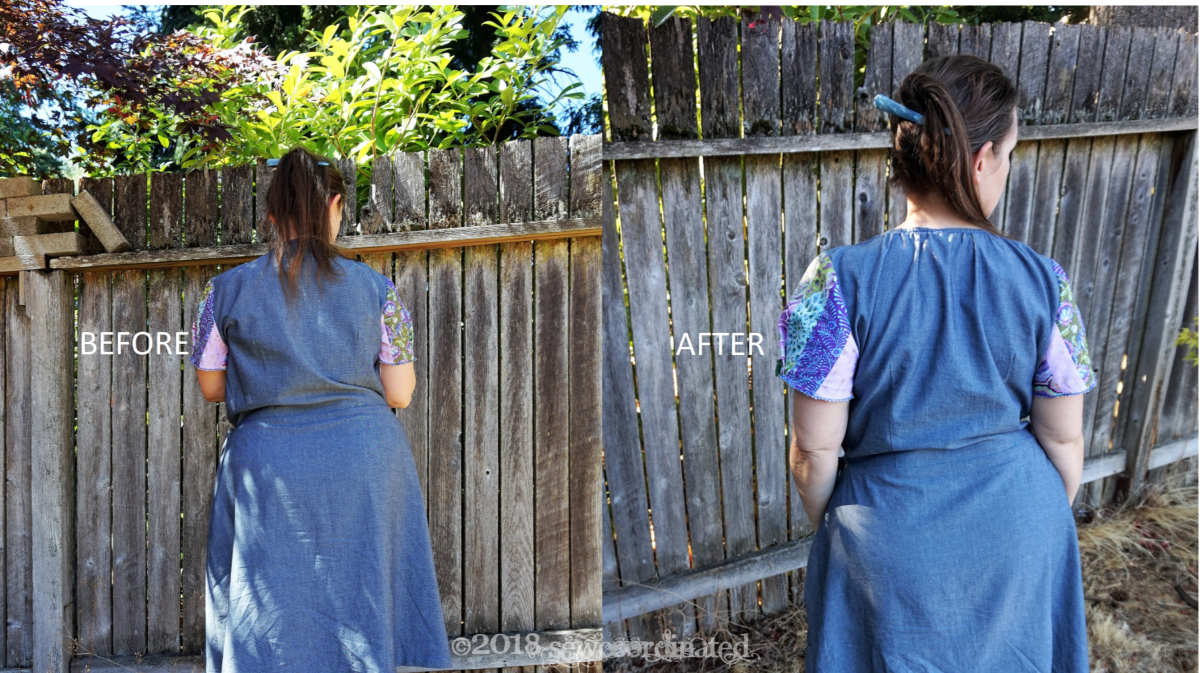
I cut a new neck binding ( I had just enough fabric for that) in the next size down. I then ran some basting stitches along the back neckline and gathered them. I wanted to tighten up the back bodice so it wouldn’t be so big and loose anymore. I was hoping that doing this would change the way the wrap front of the dress fit. After gathering I applied the new neck binding and hoped for the best. Here’s how it came out:

I made the neckline fit better in the back and managed to also lift the shoulders of the bodice, which was causing the most problems of fit: the armscye of each sleeve was drooping down off my shoulders. That’s not the fit the dress was designed to have. I had to do a workaround by gathering the back neck, which created more folds, but it did improve the fit for me, and that’s really the most important thing, because if it doesn’t fit right, I probably won’t ever wear it!
Here’s how it looks from the front:
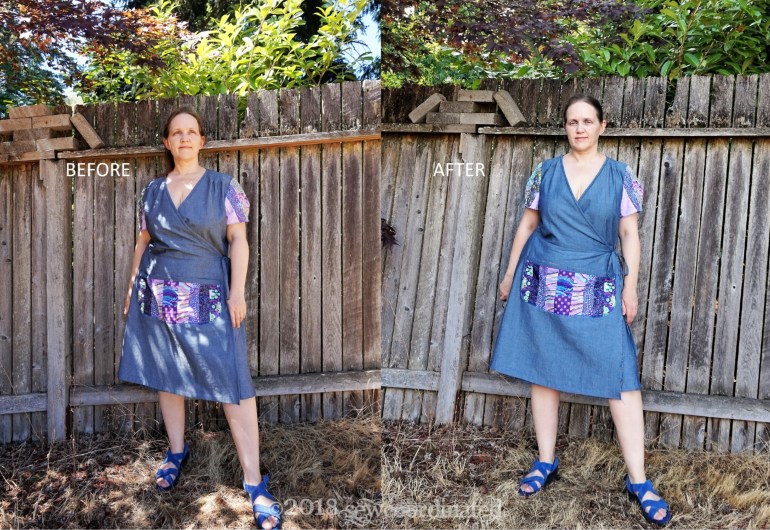
I’ve now proven to myself that I can do alterations when necessary, and it in this case it really was.
Take care and thanks for reading 🙂
